Kibana Notebooks
A Kibana notebook is an interface that lets you easily combine live visualizations and narrative text in a single notebook interface.
With Kibana notebooks, you can interactively explore data by running different visualizations and share your work with team members to collaborate on a project.
A notebook is a document composed of two elements: Kibana visualizations and paragraphs (Markdown). Choose multiple timelines to compare and contrast visualizations.
Common use cases include creating postmortem reports, designing runbooks, building live infrastructure reports, and writing documentation.
Get Started with Notebooks
To get started, choose Kibana Notebooks in Kibana.
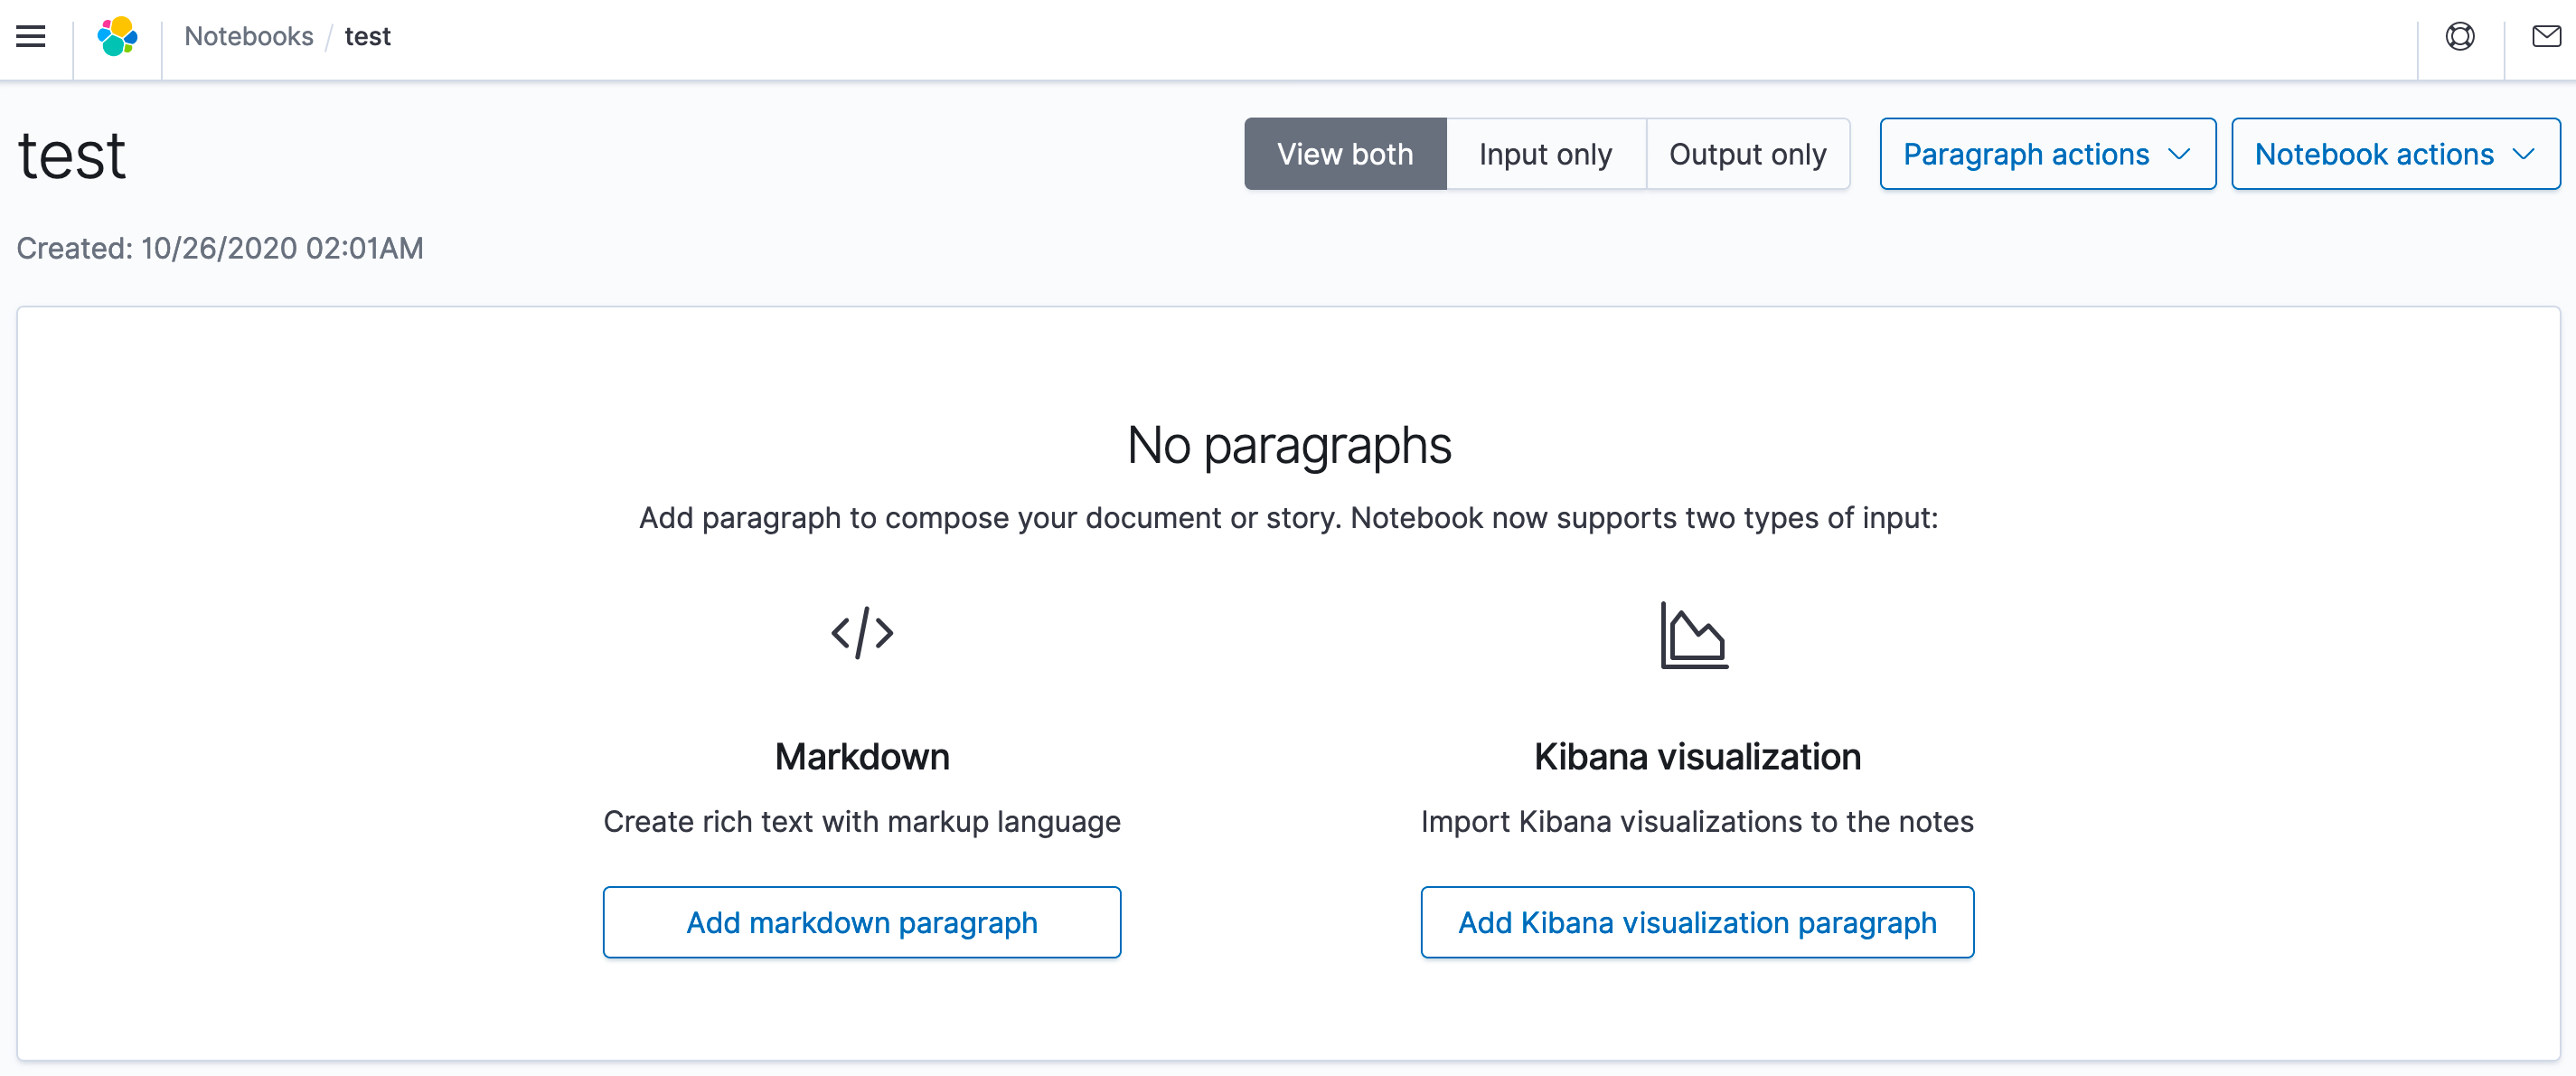
Step 1: Create a notebook
A notebook is an interface for creating reports.
- Choose Create notebook and enter a descriptive name.
- Choose Create.
Choose Notebook actions to rename, duplicate, or delete a notebook.
Step 2: Add a paragraph
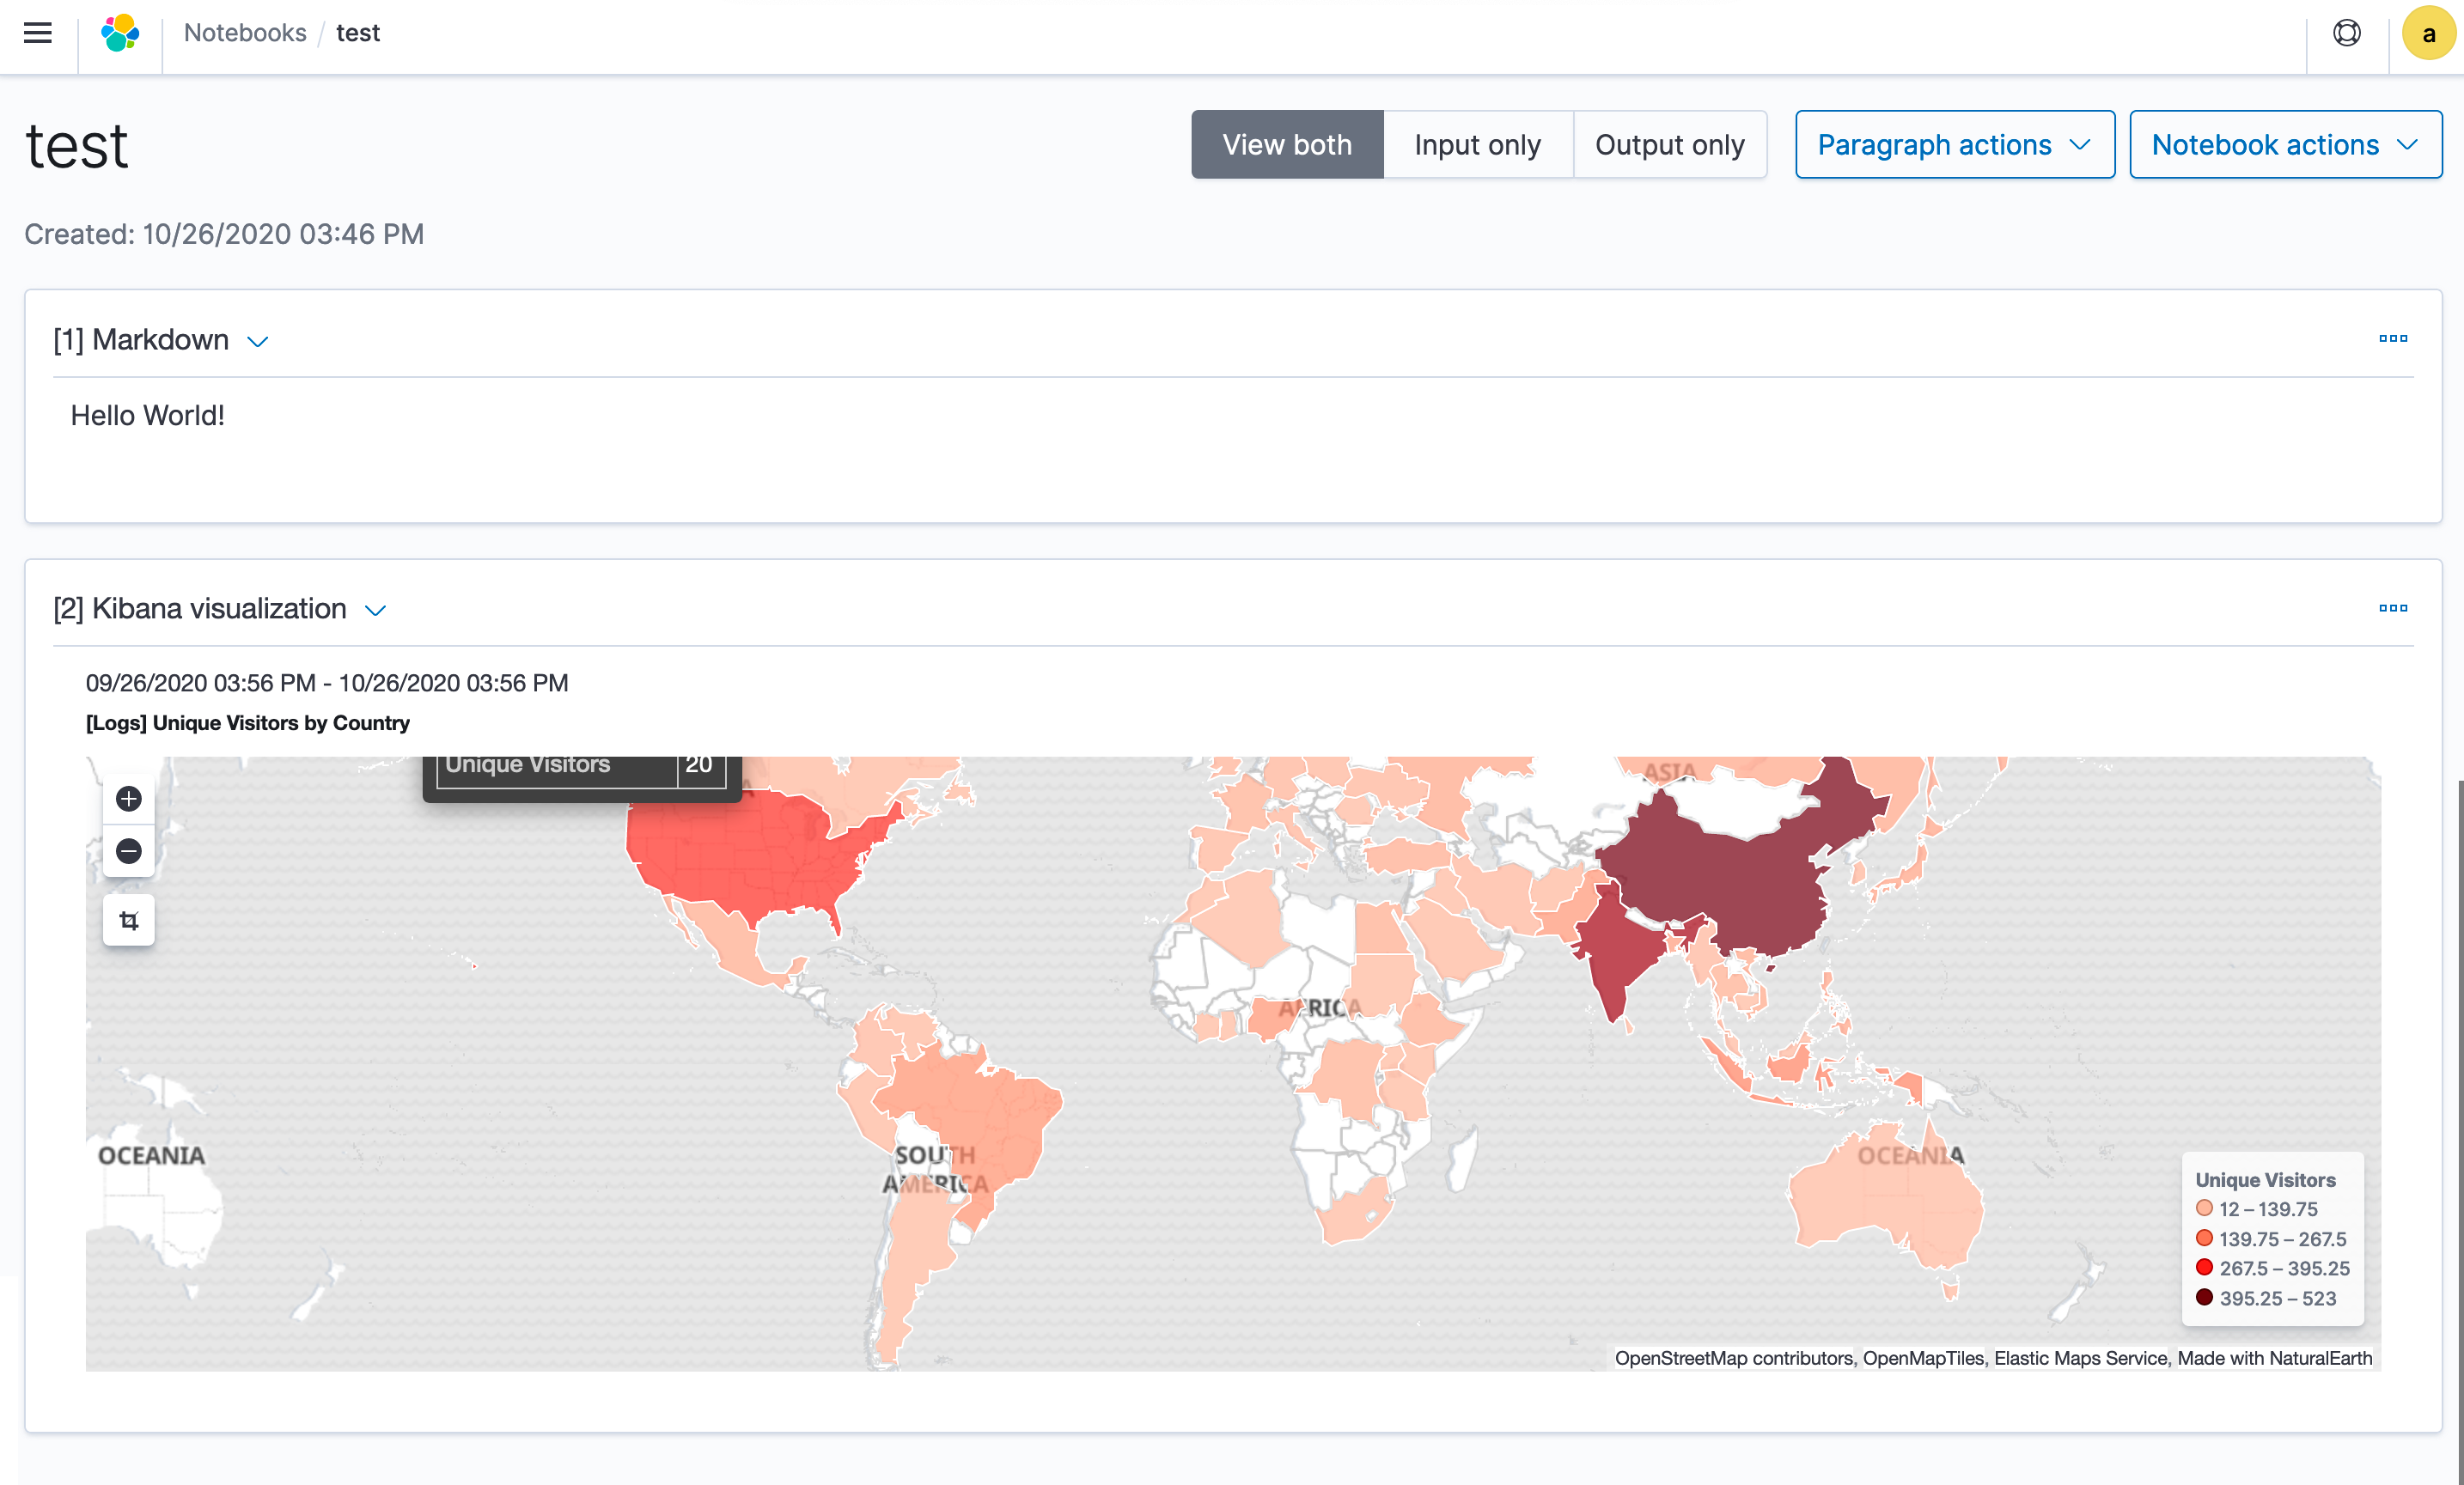
Paragraphs combine text and visualizations for describing data.
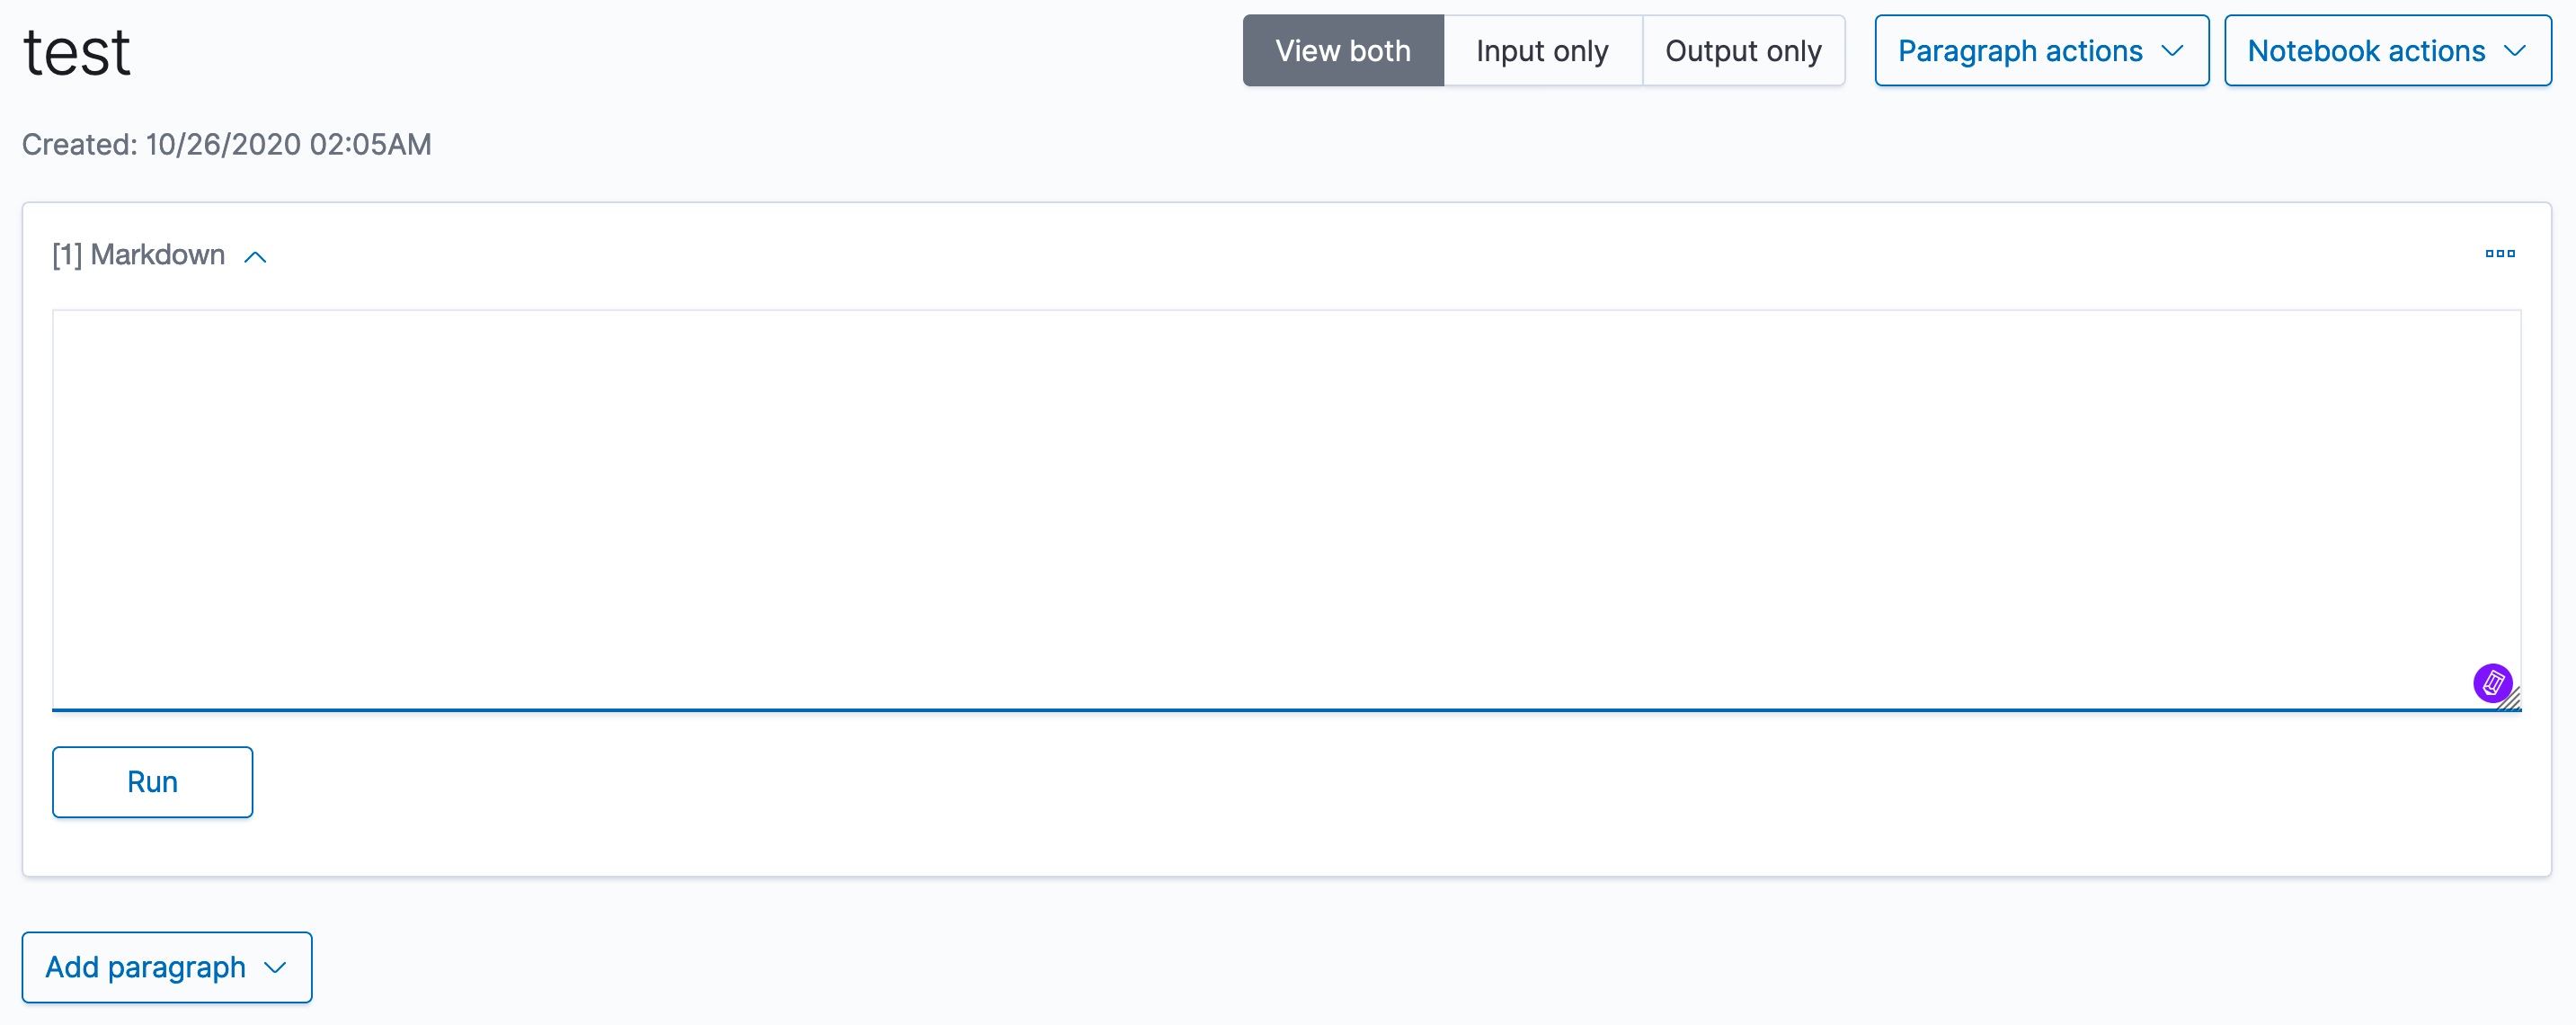
Add a markdown paragraph
- To add text, choose Add markdown paragraph.
- Add rich text with markdown syntax.
Add a visualization paragraph
- To add a visualization, choose Add Kibana visualization paragraph.
- In Title, select your visualization and choose a date range.
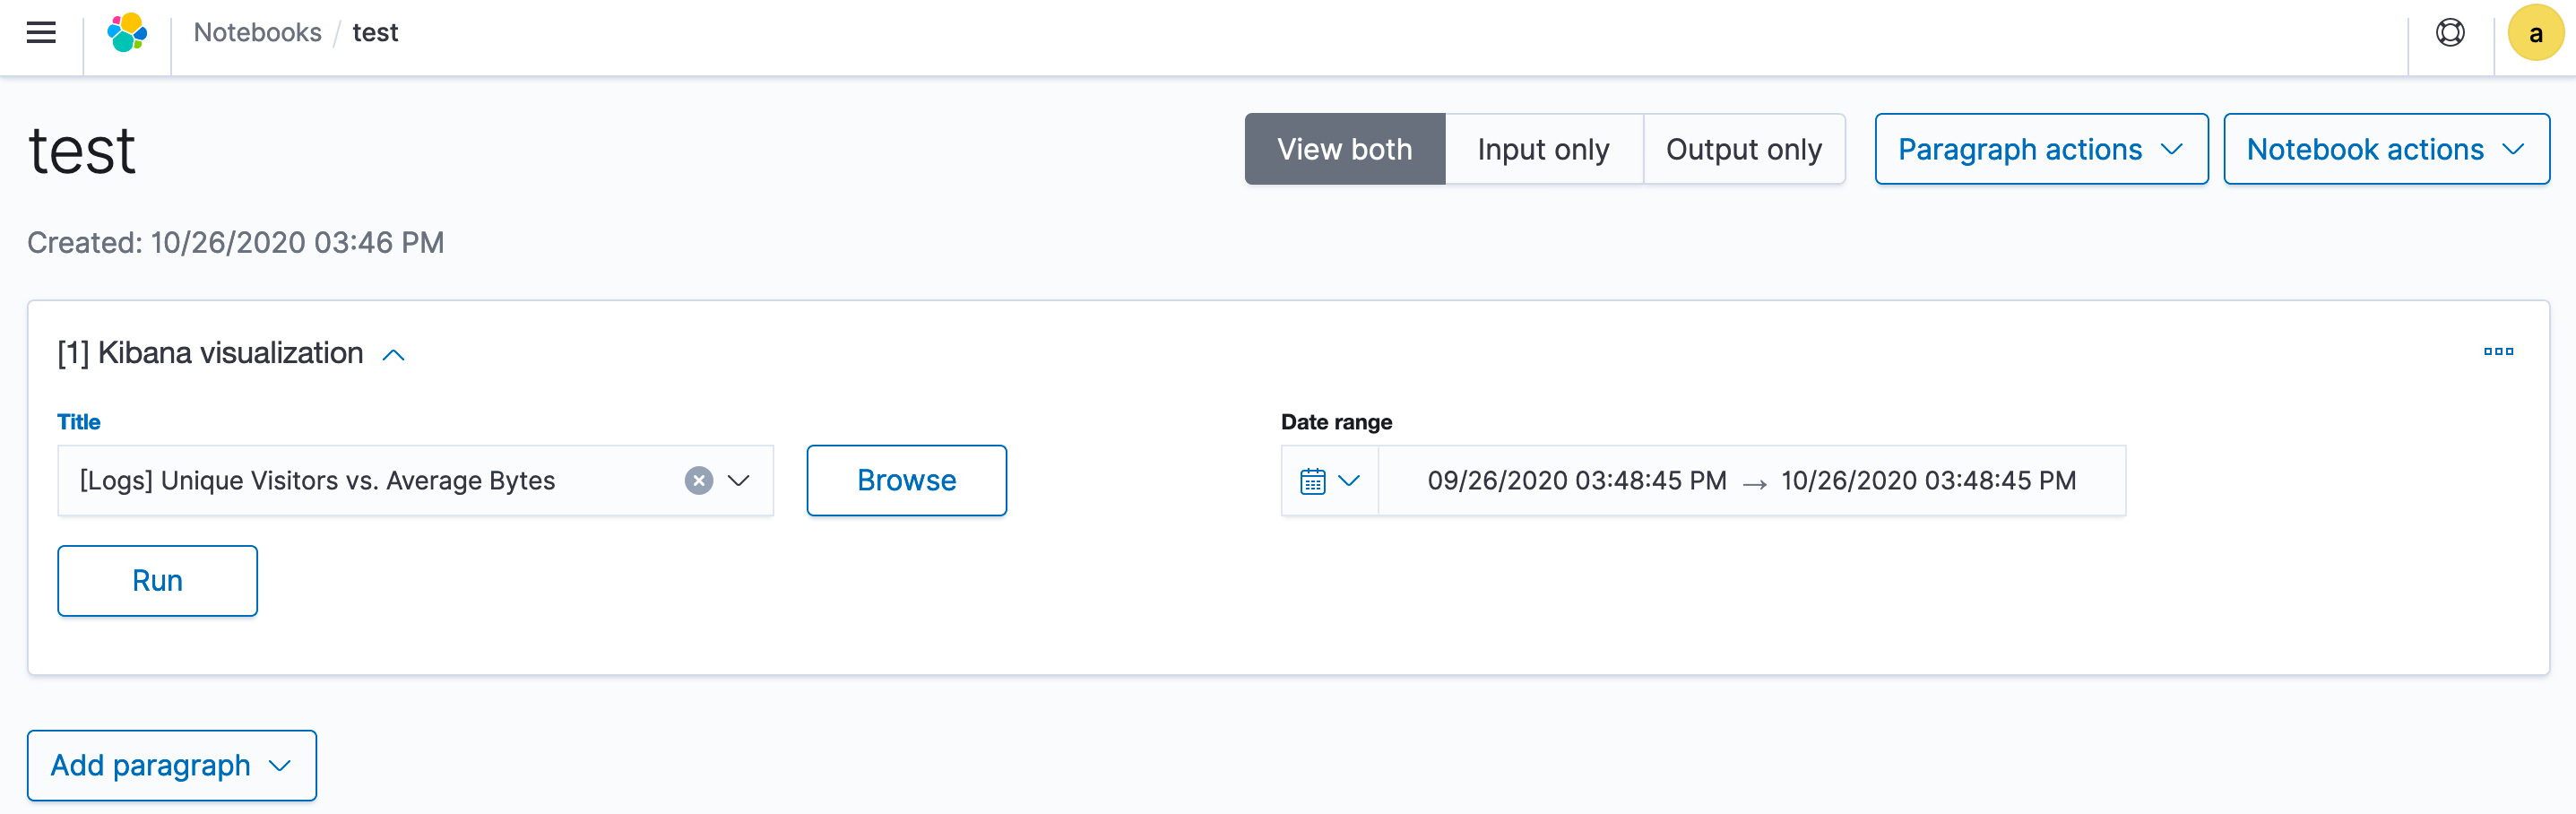
- You can choose multiple timelines to compare and contrast visualizations.
To run and save a paragraph, choose Run.
You can perform the following actions on paragraphs:
- Add a new paragraph to the top of a report.
- Add a new paragraph to the bottom of a report.
- Run all the paragraphs at the same time.
- Clear the outputs of all paragraphs.
- Delete all the paragraphs.
- Move paragraphs up and down.